Back to trash hacking main index
Not like software.
Two big differences between hacking on computers and trash hacking: One, It
is somewhat less than trivial to create another "instance" of something,
and two, it is somewhat easier to wreck things permanantly. These are
pictures from inside components that are very hard to take apart without
wrecking, most of which I, yes, did wreck. They are provided so you don't
have to make the same sacrifice I did.
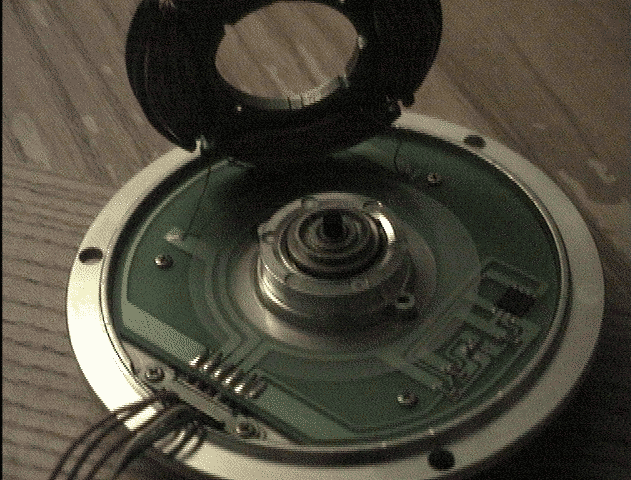
The inside of one type of platter motor from the old Seagate MFM/RLL drives
(Nidec 900552ish.) Getting the flywheel/rotor magnet off the bearing will
likely bend it. The four-contact surface mount component I accidentally
pried off along with it was black with either an Ohm symbol or a "C1" written
on it, I can't tell. I think the 8-contact chip is the Hall sensor -- it
reads "dG" on the front and "6393-8F4" on the back. Anyway you can see the
coil wires are pink, red, and brown and nothing else is in series or
parallel. It's a two-phase motor (brown is ground.) Oh well, that makes
one more ugly fridge magnet.
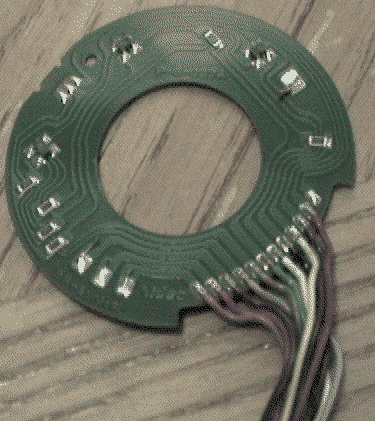
Unfortunately it's been so long I lost track which motor this board belongs
to, but I'm sure I'll run across one again sometime. As is common, the
center tap of the Y coil wiring is soldered to the board but not traced to
any of the connectors. But at least nothing is in series or parrallel with the
U/V/W coil ends.
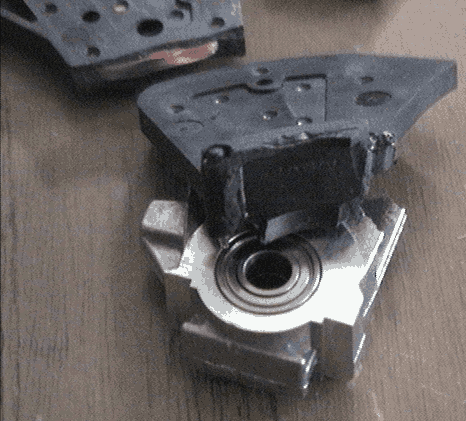
Getting the voice coil off a Quantum armature with the contact pins still
attached pretty much requires you melt the plastic in a certain point on both
sides. I've only gotten one off intact so far. Here's a picture of a failed
attempt so you can see how the metal lip runs. From the steel pins that the
ribbon cable attaches to, extremely fine coil wire run directly through the
plastic to the coil, so once it's broken (and the plastic is fairly brittle)
the only way to make a contact is to shave the area smooth, find the cable
(which may require a magnifying glass,) drop a solder bead on it and hope.
That's a chore worth avoiding.
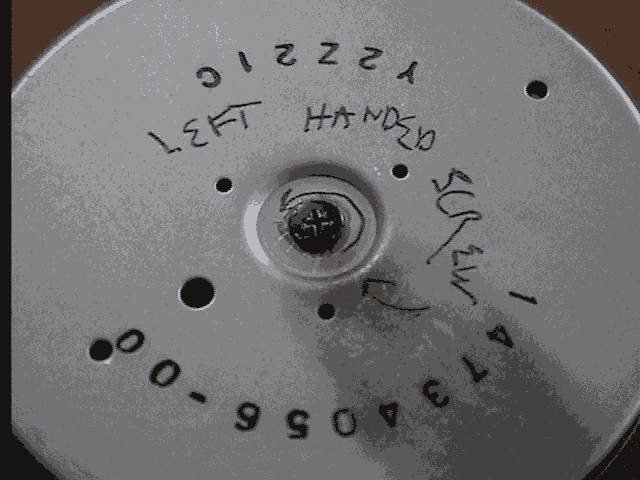
Beware the floppy-drive motor infamous left-handed screw. Floppy motor screws
are extremely hard to get out because they are glued in pretty heavily, so
it's extremely annoying that, on top of that problem, a good number of floppy
drive center spindle screws are left-threaded. This means if they are
drilled out after being stripped, good luck finding a replacement. Before
trying a screwdriver, because even those rare ones that fit still seem to strip
the bolt, I have had some luck with this: I clean enough of the guts from
the other side of the floppy so I can get a firm grasp of the plastic
disk that rotates with the flywheel. Then I try to rotate the two
independently, which will sometimes take the whole thing apart, but at the very
least, it helps break any glue between the screw and the flyweel.
 Once you've got the disk off you can get the circuit board off and you are
well on your way to the old-hat trick of hacking the floppy motor into some
sort of robotics device.
Once you've got the disk off you can get the circuit board off and you are
well on your way to the old-hat trick of hacking the floppy motor into some
sort of robotics device.
 This shows just how easy that is with 3.5" floppies. Since the bottom row
of pins is grounded, just put a jumper across the inputs you want permanently
pulled low. For more on hacking floppies, see the
SunFlopper page.
This shows just how easy that is with 3.5" floppies. Since the bottom row
of pins is grounded, just put a jumper across the inputs you want permanently
pulled low. For more on hacking floppies, see the
SunFlopper page.
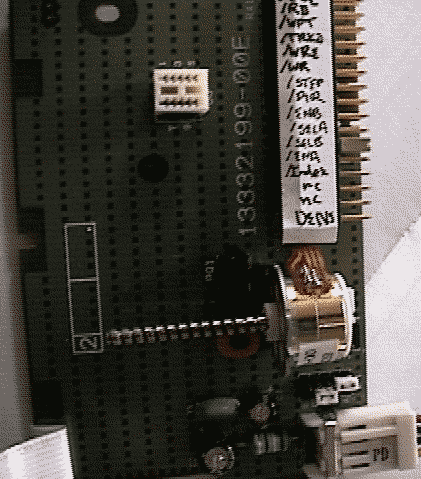
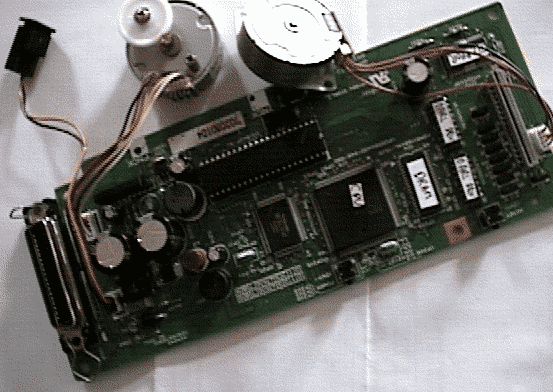 ...but if you really want good cheap robot guts, try an old bubblejet.
You know, the kind where it costs half as much to replace the ink cartridge
as the entire unit costs. This is the circuitboard from a Cannon BJC240.
It's got two stepper motors with driver circuits all wired up to a couple
small CPUs that are running off some RAM and a ROM that is in a
removable socket. There are three phototransistors (the third is on
the head tape connector which is not shown), two buttons, a beeper, a LED,
and of course a parrallel port connector. This model runs off a wall wart
so the mainboard takes 13.5V DC, which is then charge-pumped to 27V to drive
the steppers. AC models will have a second AC convertor board and will expect
the 27V and a lower level logic supply to be provided -- so go for the
wall-wart models as they will be much easier to construct a battery for.
...but if you really want good cheap robot guts, try an old bubblejet.
You know, the kind where it costs half as much to replace the ink cartridge
as the entire unit costs. This is the circuitboard from a Cannon BJC240.
It's got two stepper motors with driver circuits all wired up to a couple
small CPUs that are running off some RAM and a ROM that is in a
removable socket. There are three phototransistors (the third is on
the head tape connector which is not shown), two buttons, a beeper, a LED,
and of course a parrallel port connector. This model runs off a wall wart
so the mainboard takes 13.5V DC, which is then charge-pumped to 27V to drive
the steppers. AC models will have a second AC convertor board and will expect
the 27V and a lower level logic supply to be provided -- so go for the
wall-wart models as they will be much easier to construct a battery for.
Of course you'll need docs for the two CPU's, a compatible PROM + programmer
(or maybe a gate array could be constructed to convince the unit to load
software into RAM through the parrallel port) and you'll likely have to
rewrite the stepper motor driver for one of the motors since that seems to be
done in software -- there's only one discrete controller onboard. But what's
a hobby without its challenges?
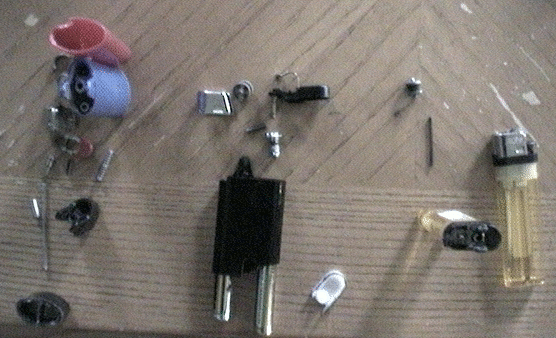
What you can expect to find inside some common disposable cigarette lighters:
springs, wheels, flints, tubes, and valves. On the left is the good old
Bic. If your objective is to light cigarettes, then accept no substitutes...
they are extremely reliable. However, if you want to use it for other stuff
later when you are done, get the Djeep shown in the middle. They aren't as
reliable as the Bic, but they aren't too bad and they have more interesting
guts. The valve comes out of the Djeep easily in one piece and looks sturdier.
Also, as shown, the Djeep's inside cavities are much bigger and with very
little effort can be pursuaded to fit AAA batteries. On the right is the
pernicious Ace lighter. Avoid it at all costs. I can't remember ever owning
one of these that didn't break well before all the fluid was gone. The flint
is half the diameter of the other two and frequently shatters against the
wheel, and the plastic in the valve arm tends to melt if used for anything
but a short duration.
Other people's adventures
- photos from inside a self-heating beverage can.
...many more to come.
...I've accidentally destroyed a good number of parts in my day :-)
Back to trash hacking main index